Saturday, January 5, 2013

When a die hard Photoshop user tries new things: Part 3 - Sumo Paint

Today after much aggravation from Shockwave Flash issues I was determined to finish what I started in Sumopaint. I had a good start in it yesterday when the Flash plugin quit on me. This has happened several times but interesting enough, only in the Sumopaint editor. No other editor that I was in killed my Flash. But then, it seems as though none of the other editors are as powerful or come anywhere close to matching up with Adobe Photoshop as Sumopaint did. (Note, its still NOT Photoshop!)

As an added test, I opened it up in Firefox and was able to continue my editing without any crashes or hiccups. It seems to save and respond to edits a lot quicker in Firefox than in Chrome - at least on a Mac. I'm not sure why I didn't think of this earlier. It probably would have saved me a lot of aggravation and Shockwave Flash crashes to my browser. (It crashed 6 times on me in Chrome and I still was not able to save the final version as a .jpg to my computer from Chrome. Thankfully, my trusty Firefox came through.)

I've been introduced to Sumopaint before at other workshops in school, so I've had the delight of playing with it before but its been a while since I've used it. It wasn't even one of my first picks, but I've read some really good reviews about this editor that I decided I should at least give it a shot. I know now, though, the next time I use it, to open it in Firefox and not Chrome.

Upon opening Sumopaint from the app, the interface and workspace area has a layout similar to Adobe Photoshop, toolbar with icons down the left side; color, swatches, and layers palettes down the right side, (That's right, I said layers!) and workspace in the middle. Just like in Photoshop, you can open an image to edit or you can create a new one. There is also a top menu much like the one in Photoshop, with File, Edit, Image, Select, Layer, Adjustments, Filters, View, and Help. (The Help menu is actually quite helpful with links to video tutorials in YouTube, information about the graphic editor, and a link to the Sumo Community which is like a forum with a gallery for "Sumopaint artists" to showcase their work. I even noticed a list of different themed contests in the Sumo Community board.

The icons in the toolbar on the left are much like the ones in Photoshop, or even Paint Shop Pro, for that matter, but are all laid out, nothing hidden under the icons that you have to go search for, like in PS. That being said, I noticed some of my favorite tools were missing, like the healing tool, dodge and burn, and the pen tool for drawing your own paths. There also does not appear to be a Red Eye Removal tool that many of the other free photo editors I used did have. (Fortunately, I did not need to fix red eyes in this photo. But I'm sure with all of the tools that were available to me, I would have been able to fix the red eyes by other means in Sumopaint should I have needed to.) Most of the tools had options and modes at the top for further fine tuning like in Photoshop. Also, some of the same keyboard short cuts I use in Photoshop worked in Sumopaint, such as using the alt key to select an area to clone from or for the color dropper selector tool while using the paint brush, and the cmd + i or d for invert or deselect on the selection tool. The one tool that did not have any available options on, which surprised me, was the cropping tool. Not even a "Constrain Proportions" check box. I would have thought with all of the flexibility and tools available in this editor that the cropping tool would have had standard image sizes or an option to constrain proportions. One thing that surprised me in a good way was the selection of brushes available. Much more than the usual round and round blurred brushes. (Incidentally, be prepared to switch tools when you first open up Sumopaint as the default opening tool is a 30 pixel dry brush set on black at 100% opacity.)

The clone tool brush took a little getting used to, but after redoing my edits on the image six times after its continuous crashes, I got a pretty good feel for using the tool. (I still like the clone brush in Photoshop MUCH better, but its good to know this editor has a clone tool.) The selection tools give you the type options of rectangle, round/elliptical, lasso (and polygon lasso), and magic wand with options for straight selection, added selection and subtract from selection modes. You also have the ability to change the border color (or even hide the border) and smooth the border. Right clicking the mouse or going up to the Selection Menu presented options to Expand, Contract, Feather, change the Border size, Inverse, and Deselect. Although plentiful in choices, Sumopaint's selection tools and advanced modes lack the Smart Radius and Edge Refinement capability found in Adobe Photoshop CS5 (and now CS6), as well as PS's Content Aware fill. However, in a lot of ways, Sumopaint reminds me of the Photoshop's early days, back to version 5. (I still remember my excitement to see how much the selection technology had advanced when version 7 came out.)

Sumopaint does have a limited assortment of filters like Photoshop's prepackage filters, but the free version of Sumopaint is limited even further with teasers left in the menu only to show you that its available in the pro version. (But at $19 for the Pro Plus version which allows you to install the editor on your own computer, its only a small teaser.)

I love the layers palette. Anyone who knows me knows I work in layers, lots of layers. (Always have multiple browser windows open with multiple upon multiple application windows open and running in the background, all the time. And the layers of paper stacks on my desk... well, that's another blog article!) I did not notice a mask layer ability, but there are layer blending options (I think they call them layer effects or fx, which is really what they are.) such as drop shadow, inner shadow, bevels, gradients, stroke, and overlay. And Sumopaint does have  the ability to Save in Layers, which is a BIG plus in my craft book! (.sumo extension which opens only in Sumopaint and does NOT save your layer style settings, like multiply, darken, lighten, overlay, screen, hard light, linear dodge, and invert. This I discovered in one of my many redos while opening the .sumo file.)

Although I did not use it in my image editing with this photo, I did take a look a the Text Tool and perused through the different fonts. I was pleasantly surprised to see that although it was a web based editor, it used the fonts I had installed in my computer in the font list. I was also pleased to see that there was the ability to rasterize and transform the text. (Although, it lacks Photoshop's robust vector processor as the  transformed text becomes pixelated and blurry very quickly. Yes, I took the liberty to play around with the Text Tool to see what it was capable of. :)

Other noticeable features missing included an HDR (High Dynamic Range) preset or filter, Photo Filter under Adjustments, Highlight/Shadows or Details adjustment options, and the ability to adjust the dpi (Dots Per Inch), or change from pixels to inches. I like being able to set photos I know I will be printing to 300 dpi and adjusting the image print out size in inches. One thing I did notice was that my resized image was automatically compressed to 72 dpi from the 300 dpi image that was uploaded. I wonder if the pro plus version when installed on the computer would allow you to adjust these settings.

All in all, not a bad little editor for a free version. It's quite powerful in its own right, as far as the free and inexpensive editors go. (Take a gander through the little intro videos on the Sumopaint home page to see some of its capabilities. Its quite inspiring, really.) However, like Photoshop, I do not recommend this editor for beginners. Its many, many options and tools (with icon images rather than text) can make it confusing for newbies. Below is the (reduced) image I edited in Sumopaint. (In Firefox. )
Pros:
An actual color palette with the ability to draw/select colors right from my photo, ability to create your own image from scratch, LOTS of drawing and shape tools, the layers palette and the ability to save in layers, a wide range of selection types and modes for fine tuning your selection (like selecting hair), blending options and layer effects, uses installed fonts from own computer in the Text Tool, nice assortment of preset gradients with the ability to adjust them and create new ones as needed, inexpensive pricing on pro versions ($9 for the Pro with extended tool and filter palettes, and $19 for the Pro Plus version with a desktop application and the ability to work offline)

Cons:
Can be confusing and difficult for beginners and newbies to photo editing, heavy Flash based interface does not like to cooperate with Google Chrome on Mac, missing the healing tool, pen/paths tool, dodge and burn tools, and content aware fill, cropping tool does not have any adjustment options or constrain proportions, does not have the ability to change the dpi or print measurement settings (inches or cm)


When a die hard Photoshop user tries new things: Part 2 - BeFunky

Opening up Google Chrome and clicking on one of the free image editors I added to my browser, I first went to BeFunky. Now, it says it adds the app to the browser, but what it really appears to do is simply add the icon as a bookmark to the site. I should also mention that I did not register to use any of these editors, although you could register. I believe that by registering and logging into your account, it will store a copy of the image you worked on in your account, and also places a copy in their gallery. I don't need any extra spam and chose not to register. When you first go to BeFunky Photo Editor you are given the option to get the app from Google Play, Get Started, view their gallery, or login - I opted for the nice big green "Get Started" button. From there you can upload an image from your computer, get one from an account online (like Facebook, Picasa, Flickr, Photobucket, your BeFunky account, or webcam), or select one of theirs to play around with.

The image opens in their editor and you are presented with a whole slew of editing tools on the left side menu. I was impressed by all of the options for a free editor. The tools included the standard straighten, crop, and resize, along with brightness/contrast, color controls, hue/saturation, exposure, sharpen, and even temperature control (something you don't always see in photo editors). These tools are also all spelled out for you - no guessing at what the little icons mean. Each tool has slider controls that allow you to fine tune the amount while you preview the image. You must also select the "apply" button for each edit option to take effect. There is no apparent selection tool or magic wand, however, most of the edit tools give you the option of a paint mode that will allow you to paint in the effect (by checking the reverse box) where you want it. You can also select the size of the brush in these options.

One nice feature of this editor that is like a feature in Photoshop (that I cannot live without) is that the undo button (at the bottom of your work space) stores each of the applied edits like a history palette. It gives you a mini thumbnail of each of the edits with the name of the applied edit underneath, so you can literally see each of the edits as they were applied, and go back to a particular one if need be. One of my favorite tools in Photoshop is the healing brush. (I don't know how I managed without it in the earlier versions of Photoshop.) BeFunky does not have a healing brush, but it does have a "Wrinkle Remover" that works similar to the healing brush. (Although I'm sure it is missing Adobe's more advanced "Content Aware" processor.) BeFunky also appears to not have a basic paint brush or pencil on its own, nor a color palette or dropper to select colors from the image. The exception to this is in the Eye Color, Lipstick, and Blush tools. These have a simple color palette and selector that allows you to have some control of the color in the color bar, but lacks a dropper tool to draw a color directly from the image itself. I do have to admit that using the paint brush and its intensity sliders takes some trial and error to get used to. I also think the Clone tool takes a little bit of getting used to and is not able to match the surroundings as closely as Photoshop would be able to. The Matte and Vignette tools are nice options, and something I wish Photoshop had without having to go through all the layer masking and object selection steps.

Blur Filter with Paint Mode and sliders
Blur Filter with Paint Mode
(& Reverse) selected showing
brush size at 25 px.
Photo editing history thumbnails
Image edit history showing when the "undo" button is clicked.


The Effects palette had options for 26 different featured photo effects (or filters) with multiple options in each effect (also with sliders for more fine tuned control) much like the effects in OnOne Software's Photo Tools Pro, one of the plugins I use with Photoshop. If you upgrade to one of the paid versions of BeFunky Photo Editor, you also have nearly 80 additional photo effects available to you. Included in the featured (and advanced/upgraded) effects are Black & White, Charcoal, Cooler, Cross Process, Cyanotype, Grunge, HDR, Motion Color, Old Photo, Orton Style, Patriotic, Pinhole, Pop Art, Sepia, Sunburst, Warmer, and Vintage Colors (with more options).

The Artsy Palette includes many of the filters that Photoshop users are accustomed to under their Artistic Filters palette, such as Cartoonizer, Gouache, Impressionist, Inkify, Oil Painting, Pointillism, Sketcher, Under Painting, and Water Color, with several versions of each filter under the selections. Again, many, many additional Artsy filters are available with the upgrade/paid version of the editor. I didn't play around with much under this palette, although the Cartoonizer is kinda cool.

The Frames Palette had many options to choose from that were featured and many more that were included in the upgrade/paid version. Each one would allow a sampling of that type of frame though that you could use with the free version. I included a screen shot of the menu on the right so you could see the available options. I played around with these options but in the end opted not to use any for the particular image I was editing. The Instant (like a Polaroid photo) and the Filmstrip options I think were the coolest.

I looked around in the Text and the Goodies palettes but did not use any of these for this photo. The text is pretty self explanatory, allows you to add text to your image as an overlay. And the Goodies palette were shapes, bubbles, and themed stickers you could add to your photo.

I was able to save my edited photo directly to my computer from BeFunky, although you are also given the option to share the image in BeFunky, Tumblr, Facebook, Twitter, and Flickr as well. It says to Save to your Desktop, but I was able to navigate to the folder I uploaded the image from and save it there. Saving options are in .jpg and .png formats with a 1-10 image quality scale. I saved my reduced size image at 8 on the quality scale. This is how it turned out:
I opened all of the images back up in Photoshop so I could compare them all side by side and see the image information. The image was reduced to 72 dpi (I think when I uploaded it) from the 300 dpi image I started with. BeFunky appears to be the only one of the 4 photo editors I tried that reduced the image to 72 dpi. The others all kept my image at 300 dpi. Unlike Photoshop, there did not appear to be any way to change the dpi settings of the image. But it did allow you to enter in your own pixel or percentage sizes for the resize. You could also select one of the standard sizes like 4x6, 5x7, 8x10, and select cell phone wallpaper sizes.

I cannot even begin to say whether I think this photo editor is easy to use or not, but I do think having the words spelled out in the menu options rather than the icons made it easier than most. All in all its not a bad editor for a free photo editor.

Pros:
Easy to navigate tool palette menus, history stored in the undo button, sliders in tool palettes for fine tuning along with paint brush options, LOTS of editing tools available for free along with a nice selection of effects. frames and goodies.

Cons:
Does not allow option to change dpi (dots per inch) settings, no color selector or dropper to select colors directly from the image (or match to the image), no healing tool, clone brush is tricky to use and does not match closely enough to area selected to clone, no selector, magic lasso, smudge, dodge, or burn tools, does not do layers.

Friday, January 4, 2013

When a die-hard Photoshop user tries new things

I'll admit it - I'm a creature of habit. Serious habits! And am resistant to change. Extremely resistant. (I'm still having issues with Blog Spot going to Blogger, and let's not even discuss Blogger's "new" interface. I say new because I fought it for so long and kept changing it back to the old layout.) I'm a creature of old, going with what I know. Some may say I play it safe. (I actually had a college English teacher tell me one time that I write well but am afraid to take risks and stay true to what I know. This was said after pointing out that I could easily identify with all of my fictional characters and settings.) So, yes, I hate changes (with a passion).

Recently I've made a few changes in my life, like getting married (after 8 years of saying I'm never getting married again), changed my Win XP machine into a Hackintosh, cleaned off my desk, and slowly but surely am making the change from Safari (and Firefox) to Google Chrome. (Still working on that one.) And after nearly 20 years of being a die-hard Adobe Photoshop user (since version 5.05), I thought I would give a few online photo editors a try. Now, I've tried other photo editors in the past, like Corel's Paint Shop Pro Photo line, Phase One's Capture One for RAW editing, Apple's iPhoto, and GIMP, (My children, all fans of Ubuntu, absolutely love GIMP!) however, I always end up going back to Photoshop (in spite of the cost). I love Photoshop's tools, its flexibility, and the control it allows me over all aspects of editing. Photoshop is my number one graphic editor, web or print. I simply cannot live without it.

While opening up Chrome, you get something that looks kinda like the screen on my Android phone, or in my iPad with all of the apps icons. So, I click on the Chrome Web Store icon and what should I see before me but a few photo editors like PicMonkey, and I'm thinking, okay, in the spirit of the new year maybe I'll try a few of these. So, in the next few blog articles, I will be comparing and reviewing the features of a few of the browser based "free" photo editors. I've chosen the same image for use in all of the photo editors for comparison, one of my wedding photos. Each one began with the same unedited photo uploaded into the browser from my computer. The one below (left) is one I edited in Adobe Photoshop CS5. Each were then resized and reduced to 450 px by 299 (or 300) px for use on the web. The one on the right is the untouched image.


Tuesday, July 24, 2012

That's very Pinteresting!


One of my favorite websites/past times is Pinterest. If you are not already on Pinterest, you have to be invited - however, there is a back door. If you go to their website, you can enter in your email, and request an invite. It shouldn't take too long before you have your invite. In fact, if you have a Twitter or Facebook account, you can use one of those to get in. Once you are in, though, its like a disease, you are hooked! You can't escape it. You will find that whenever you are near a computer or other device with Internet, you want to go to Pinterest. (Trust me, I've gotten 2 of my 3 children hooked on it, and my 11 year old keeps asking me for an account, now as well. :)

If you have never heard of Pinterest, or keep wondering what the little red "P" is that you keep seeing on websites, Pinterest is awesome for visual people. Its like taking all of your bookmarks, taking a snapshot of something you find interesting on that page, and organizing them onto bulletin boards, so you can visually see all of your bookmarks. Think of it as digitally tearing a page from a magazine of something you like, then pinning it on your cork board. Now imagine a wall covered in different themed cork boards - one with recipes, another with dream home furniture, another with craft ideas, and so on. Then imagine that you are able to share you cork boards with others, so they can see your recipe ideas, craft ideas, and dreams. That's Pinterest!

Teachers LOVE Pinterest for sharing classroom ideas, and printables for their classroom. Busy Crafters find even more ideas to add to their crafty "to-do" list; and nothing makes you want to try a recipe more than seeing a succulent, mouth watering picture of the food dish! It's great for brides, as well, as it provides a wonderful place to store (and organize) pictures of all the things you like as you are doing your wedding planning. No more dog-earing pages of bridal magazines, then trying to remember which magazine that dress or hair-do was in. Just simply scroll through your boards, and its there!

Be sure to get the "Pin It" tool for your browser. Its a little button your drag to the book marks bar on your browser, then any website you visit, any page you see, any picture you like, you can click on the "Pin It" button in your browser and add it to your pins/boards. You can also copy the URL from the page you are on, and add it as a pin while on Pinterest, or upload a picture. There's even iOS and Android apps you can download, so you are never far from Pinterest. (Although, I don't recommend the Android app. It has security issues.)

A few things to note, when you are using Pinterest, be specific in your descriptions, check the resource, and always give credit where it is due. One of my pet peeves on Pinterest is to see a wonderful picture or great idea of something, then I click on it only to find that I cannot go to the website where the person found it, I get a 404 error, or I have to go to, yet, another website to find the original directions. It only takes a few minutes, but it is so helpful to your followers, to check out the resource and make sure it is a legit site, rather than blindly repin someone else's pin. Also, if the picture is from a blog, help those that follow you, find the picture quickly enough on the blog, by clicking on the title of the article and going directly to that page (rather than the general site root, and having to do a search through the whole blog site for that one "how-to"). This will save them a lot of extra time and frustration. If the page no longer exists (which happens a lot in re-pins), I check around on Google for something like it using keywords from the picture. If I can't find it, I don't post it. If I see a pin that takes me to blog, where I have to another blog to find the directions, I help my followers, by copying the link for the original blog article, repin the picture (so credit is given to the original person I got it from), but then go back and edit the link so the directions are easily found.

Some times there are cases where you are not able to grab a picture from the site you like, but you really want it, so you take a screen shot of it. Upload the screen shot, but then make sure you copy the URL so you can give credit to the site.

Another pet peeve of mine is to see key words repeated in the description over and over. Like, love, love, love - or dress, dress, dress. Really?! I can see it's a dress (or whatever the key word is). Be descriptive. What is it that you like about it? What is it made of? How would you use it, or where would you put it?

As a teacher, I'm bothered by the lack of capitalization or punctuation in the descriptions as well. I realize that a lot of the time, most pinners are pinning from a mobile device and capitalizing is an extra step. But, please, take a few minutes to capitalize! (That just makes me want to take out my red teacher pen, and correct their mistakes in the comments section under their picture.)

Okay, end of lecture. I should probably mention, since I talked about them above, that you can follow people, or rather their boards, on Pinterest. You can follow just one of their boards, or you can follow all of their boards. Then, when you open up Pinterest, you can see the ideas and pictures they have been pinning. You can search or go through tons of different categories, like Art, Photography, Crafts, Education, etc. If you find someone that has a lot of great ideas pinned in one board, you may want to follow just that one board. Or, if its a friend, you may want to follow all of their boards.

One last piece of caution advice, be careful you don't get yourself blocked from pinning. It can easily happen, especially if you are doing a lot of constant repinning or following boards. (And, by following, I mean, that you are actively searching for people or boards to follow, then clicking on the follow button.) If you do find you are blocked from pinning and are not able to pin any more, don't worry. Send them an email, let them know you are blocked, and that you are a real person, and not a bot, and they will remove the block.


Friday, July 13, 2012

Learning New Things in Familiar Applications


One of my favorite applications to use on the computer is Adobe Photoshop. In fact, its one of my favorite things to do, period. I love to fire up my computer and open up Photoshop for any reason, some times, just to take my mind off my troubles. (And with the new upgrades in my computer's hardware it it opens up faster than ever! No more waiting on fonts, filters, and plugins to load!) I've been a Photoshop enthusiast for the better part of 15 years, since Photoshop 5 and now I'm on Photoshop CS5. This is my primary design and graphics editor. Sure there are others I could use and have used, like Illustrator, Fireworks, and Flash (not to mention Corel Draw), but I feel so much at home on Photoshop, why go somewhere else?

However, after 15 years of using this program, there are still so many things for me to learn about it. In my last blog article I talked about the need to learn more about using paths and the pen tool. Always committed to life-long learning, I look for ways to learn more in any area that interests me. And, even after 15 years, Photoshop is no different. One of the best ways for me to learn about something on the computer, other than the obvious, dive right in and see what it can do, is through tutorials. Some times I search for specific tutorials and other times, especially in Photoshop, I rely on sight and go by a picture that looks cool to me. There are many free tutorial sites out there on Photoshop (Planet Photoshop, Photoshop Cafe, and Adobe Tutorialz to name a few.) with great mini-lessons that teach you about the tools while you create a work of art. I love these tutorials as compared to other lessons where you sit down open it up or play the video, and they start out by, today we are going to learn how to use the pen tool... (Snooze! Sorry, already lost me!) Show me some eye-candy first (follow these steps and you can make something that looks like this) and I go, oooh!

I came across a tutorial that helped me create the image at the top of the blog article while pinning around in Pinterest the other day. I almost passed it up but then noticed that it was a tutorial on creating a lace stroke effect on text. (I'm sorry I can't remember where/who I originally got it from on Pinterest.) The pin lead me to a site (Web Design Library) I wouldn't have thought of for a Photoshop tutorial (although, I now know to go there as they have MANY Photoshop tutorials and lots of other great tutorials!) I love tutorials like this one because they show you step by step with pictures of the interface you are using and what to click on and where. The screen captures allow you to work at your own pace without having to keep pausing a video at each step and then replay it. (Although video tutorials work well at times, too.)

The original image in the tutorial looked like this:


Through the course of the tutorial I learned about using the Polygon Tool (and adjusting options on it), defining a pattern, using Paths (which is what I was looking for), working with text, and much more. If you have never tried an online tutorial, I encourage you to try it - start simple, find an image you like, and start there. You will feel very good about yourself when you finish the tutorial and will have something really cool you can show. I altered mine slightly to fit in with my Moulin Rouge style kitchen (a project that I will hopefully get to this fall when the weather is cooler and more accommodating for painting cabinetry). If you would like to see the tutorial for the the Lace Stroke Text Effect shown in the picture above, click on the picture to go to the page.

Wednesday, July 11, 2012

Creating shape frames in Photoshop CS5

I'm always learning and on the look out for new things to learn. Today was no different. While working on a new layout for my school's website, I decided there had to be an easier way to make shaped outlines than the way I was doing it. Make a shape, adding a border and then deleting the shape just wasn't doing it for me. There had a be another way. So, I set out in a Google search for a tutorial. But could not find one that told me what I needed to know. Then, I started playing around with paths and discovered a way to get the outline I wanted at the thickness I needed.

I've used Photoshop for the better part of 15 years, but have never played much with the pen tool or paths. I've mostly used it as a graphic and photo editor rather than a drawing tool. (I know, some will tell me I should have used Illustrator or Corel Draw, but old habits die hard - I'm quite comfortable designing in Photoshop.) If you are like me and fairly inexperienced with using paths in Photoshop, this is for you:

Open a new document in Photoshop and add a new layer. (Or just add a new layer to what you are working on where you need the shape outline.) Select the Brush tool, making sure it is on the Hard Round setting rather than the Soft Round setting (otherwise you end up with blurred outlines), and set the Size to the size of thickness you want your outline to be. I set mine to 10 pixels.


Go to your color selector and select the desired color for the outline. (I chose red.)

Next go to your shape tool and select the desire shape you want your outline to be in. (For this example, I chose a heart.)


Make sure your Shape Tool is set to "Paths" rather than "Fill pixels", other wise you will end up with a solid shape.


And draw your shape:


Next, go to your Path palette and select your work path.


Right click (or control + click, on a Mac) so you have your Work Path edit menu, and select "Stroke Path"


You should have a color outline of your shape with a path sitting on top. It looks like a thin gray line.


You can get rid of your path now and style the outline as you like, by clicking back on the Path Palette, right clicking on the Work Path, and selecting "Delete Path":


Apply your desired Style from the Style Palette and create your own using the Blending Options in the Layer Palette. I made mine glassy looking with a rounded Bevel. This is the setting I used:


And ended up with a heart frame that looks like this:


Now you have an outline you can use to frame what ever you want inside. Its great for outlining headers, framing menu boxes, or adding an little extra to your photos. Whatever you do, just have fun with it!

Sunday, July 8, 2012

Making my computer useful again!

Its summer time and my "to-do" list is a mile long, update the school's website, inventory and clean up the computers, switch some computers around, set up new computers, plan for next year, and so on. However, I gave myself something extra to work on this summer - revamping my old desktop computer and making it useful (to me) once again. It was getting time to clean it all out and do a fresh install of Windows on a wiped hard drive. This is something I try to do every year, but sadly the neglected computer was long over due for a good cleaning. The poor thing had become sluggish and cumbersome, so much so that most of the time, it was easier to pull out the Macbook Pro and sit at the dining room table whenever a computer was needed.

Something had to be done about this sad computer that sat quietly day after day unused in the corner of my desk. I could go through the trouble of backing everything up, cleaning the main drive off, and reinstalling Windows XP and ALL of my programs on it, once again, like I've been doing for years, follow the kids' route and go Linux (both of my two older kids have recently switched over to Ubuntu on their laptops, and love it!), or I could go the Mac way since I'm so used to working on Macs at school. My Geek Man talked me into rebuilding my computer with some of his old (but still new to me, and better than what I had been using) parts and a few new parts, and installing Snow Leopard, Mac OS 10.6 on it. (He just recently upgraded and rebuilt his computer, and thus had extra parts.) Essentially, I turned my desktop into a Hackintosh machine.

I would not recommend to everyone to go through this process - its not for the timid or weak! It took me about a good solid week to get it up and running (stable) with Snow Leopard on it, and another few more days to have Mac running on my SATA drive. I discovered I was not able to install Mac on my new terabyte SATA drive, but had to use an older IDE drive to set up Mac OS on. Once I had it running stable on the IDE drive, I was able to hook up the SATA drive, use Disk Utility to format the drive for Mac and partition it, then use Carbon Copy Cloner to clone my IDE drive with all my Mac applications loaded on it onto the SATA drive.

Along the way we ended up buying another mother board as the other one did not support AHCI. As it turns out, the new one, which was on the recommended list of mother boards, does not support AHCI. (Many of you are thinking, AHC-what?! I'm not sure I fully understand it either, but I know its a setting in BIOS that is essential for allowing Mac OS X to run smoothly on non-Apple parts.) We also bought a new video card for the computer, one that was also on a recommended list, but ended up going back to the original one I started with. And, with the new mother board, came new RAM (memory).

I also have been able to set up Windows XP 64-bit as a virtual machine (using Virtual Box). Although, I think I'm going to be getting Windows 7 64-bit and installing that on Virtual Box instead so that I can run Office 2010 on the Windows side.

It's still not 100% on par, yet, but its getting there. There are still a few kinks that I am currently working on, such as being able to boot directly into Mac with a bootloader disc (iBoot), running at 64-bit rather than 32-bit on the Mac side, and making use of all 8 GB of my RAM rather than half. Today I set up the speakers on the computer, something I haven't had on the desktop in years, and am happy to report that they do indeed work on this set up.

So, here's the specs for the new rig:
2.4 GHz Quad Core Intel Xeon processor
Asus P5G41T-M LX plus mother board
nVidia GeForce 8800 GT graphics card
8 GB 1066MHz DDR3 RAM (can only get it to use 1 of the 2 sticks, so operating at 4 GB)
Logitech Z5500 THX 5.1 Speakers

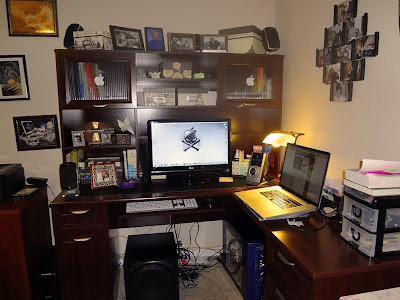
And, with a new computer system, came a new desk and workspace! Haven't totally put the new system to the test yet, or even given it a good work out. But, I have been using Photoshop CS 5 on it the last couple of days, and I have to say, Photoshop has never loaded quite as fast as it does on here now.

One thing I would strongly advise for any rebuild, or reinstall of any operating system - back up EVERYTHING before you begin. I made the mistake of not backing up my main hard drive that had my working desktop and all of my programs
on it, and discovered afterwards the drive had gotten damaged in the process of switching drives. Minor set back - just had to redo a few graphic files I was working on that I had saved on the desktop on that drive. Fortunately, I always keep my data on other drives separate from my operating system and programs/applications drive, so was able to back up the majority of my data.

Some sites I highly recommend you read up on, if you are thinking of trying something like converting your old Windows machine to Mac:
Now that the rebuild and revamp is mostly done, and the new desk is put together, maybe I can work on some of that summer "to-do" list!


Saturday, February 11, 2012

SPAM in my mailbox? Ew, Yuck!


I opened my mailbox for my school email account this morning only to find spam. Ew, Yuck! Sadly, though, for most, its a familiar sight, especially for teachers. It seems like every educational vendor in the world finds out your a teacher and they love blasting your mailbox with emails about why you should buy from them. For most, we've learned to deal with this as a normal part of life, just quietly delete their emails (unopened) and add their email address to your email filters. However, in my positionas my school's tech one thing I have learned is to not assume that everyone knows what to do in these situations. I receive questions about spam and unwanted emails on weekly, if not daily basis. The following is what I posted in our Tech Info folder for my staff:

I received the following email message this morning when I checked my email. I'm passing this along to you with some tips about how to protect yourself from receiving unwanted spam or possibly being hacked.

The only reason I opened the following email was because I thought it might have been from some ed professional group I had subscribed to. Turns out it wasn't, and I should have known better.

1. You can tell that it is not something I subscribe to because they addressed me as "Edcuation Professional". If it had been something I subscribed to, they already would have had my full name, or screen name I use on their site.

2. A quick search in Google for "MDR" revealed this as the TOP reference:

Hm, YIKES! I should have done this first, then I would have known not to open the email.

3. As I read on in the email it said: "As a member of MDR's Education Professional Email Database, if you do not wish to receive these informative email messages, please follow this link:"

I know I have not subscribed to this place so I'm NOT a member. I'm NOT clicking on their link. They are phishing for valid email addresses. If I clicked on the link, that would be a sign to them that my email address is a working email address. It would have opened me up as fresh meat to all sorts of venders just waiting to fill my email box with spam.

4. What to do with the email now? Simply delete it. I'm also going to be adding their email address to my email filters.


----- Original Message -----


Dear Education Professional,

We respect your time and value your opinion as an Education Professional, which is why we would like an opportunity to keep you current on products and services from relevant advertising partners, such as leading publishers, education technology providers and education associations.

Each email message will be preceded by the name of the company offering the product or service, so that you know the source and purpose of the email before opening.

As a member of MDR's Education Professional Email Database, if you do not wish to receive these informative email messages, please follow this link:

http://mdrcomm.net/o/?ZXD=184.13552376.7031083

Your option here will not affect any other services from us.

MDR

6 Armstrong Road

Shelton, CT 06484


Hopefully, this has helped some of you who already didn't know what to do when you receive and an unfamiliar email. In my next blog article I will be listing some tips on how to avoid unwanted mail in both your email box and your home (or school) mailbox. As always, I do so appreciate comments. Thanks for reading.


Saturday, January 28, 2012

Epson - It's so easy!

I am in love with Epson products. I have been for years. However, this weekend, I have rekindled my passion for Epson products with the purchase of my family's third Epson printer, the Epson Artisan 837. This all-in-one printer comes power-packed with options and tools to send this geeky family into nerdvana.

Out of the box set up on our home network time was within 10 minutes, or if not quite 10 minutes, it seemed as though because it was so incredibly easy. We followed the easy to follow instructions on the Quick Set Up guide (We have, yet, to read the complete instruction manual that came with the printer.) and within minutes were hitting the Print Test Page button from our computers. The printer seemed to react instantaneously to our touch, or click of the mouse button. Seconds later we were viewing our first page printed on our new printer. The Artisan 837 all-in-one printer is different from our previous two Epson printers in that we were able to set the printer up to our home network via ethernet and not USB.

While Kinetic, our resident Geekman Guru, was installing the print drivers and tools on his computer through the included CD, I was effortlessly cruising Epson's website locating the drivers I needed to install the print software on my own desktop computer. The site was easy to navigate and find what I was looking for, without the need for using the site's search bar. Through my search through the site's menu system, I was able to spy enough to whet my appetite and make me want to linger on the site long after I downloaded and installed my desired software. In my opinion, that's the mark of a well-designed site - make it easy to find what they are looking for, and drop a few nuggets along the way to make them want to come back for more. (My ADD instantly kicked in as I found myself perusing and might I say drooling over their pro photography series. But we'll leave those details for another blog post.)

It wasn't long after my geeky man printed his test page that I was printing the test page from my own computer using the downloaded driver from the Epson site. The only difference we noticed between the two delivery methods was that the downloaded package did not include the ABBYY FinePrint Reader. (Hint, Epson, please include this in your print driver package online.) Mac users may recognize this name as OCR (Optical Character Reader) software. One of the things we did notice while installing the software was their Epson Connect services that allows us to print to our printer from anywhere via email. We were assigned a generic printer email address @epsonconnect.com, however, once logged into the Epson Connect site, had the ability to customize the email address to one that was more memorable to our family than a random combination of letters and numbers that seemed like it was a mile long.

Today the Epson fun continues after effortlessly installing the print software on my Macbook Pro. Not only was I able to wirelessly print pages within moments of installing the software and adding the printer (a school tech's dream, adding a printer was never easier), but I was also able to scan a picture off the printer from another room. (Look, Mom, no wires!) It only required me getting up and putting a picture on the printer. (Had my youngest been here, I would not have had to get up at all. :)

After adding the printer to my laptop, I had to see about the possibility of printing from my cell phone. A visit to the Android Marketplace and I was continuing my nerdgasm as I was printing from my phone via Epson iPrint, a free app, I might add. (Epson iPrint is also available in the Apple App Store for free for the iOS devices. My iPad was also able to print from two rooms away.)

One word of caution, though, when printing via email, be prepared to have your picture printed in full sheet size. I resized a picture I needed to print for school to 5x7 only to see it print out full sized on a standard 8 1/2 x 11 paper. Perhaps there is a setting to change this that I have yet to discover. (Maybe its in the manual I still need to read.) One nice feature about the email printing I love is that ability to set who can and cannot print to the printer in emails. (Be sure you enter the email addresses in carefully. One tiny little typo will have you receiving an email notification that your email is not on the Approved Printer list.) You will also receive email notification that your print job is complete.

Other features included in our new Epson Artisan 837 all-in-one printer are the card reader slots for Memory Stick, SD Cards, Compact Flash cards, and USB, making it easy to print directly from memory storage cards and flash drives without having a computer on, included tray for photo paper, and a fax machine. Our other Epson all-in-one printer will be finding a new home in the dining room attached to my kids' iMac. Although they could just as easily print wirelessly from their iMac to the new printer, it would be a shame to waste a perfectly good printer just because it is getting up there in years. (I, for one, would hate to be traded in for a younger model.) They will be able to enjoy being able to scan in their own pictures into Photoshop. (I hope we have taught them well in this area.) And thus, the Epson legacy lives on in our young.


Thursday, January 12, 2012

LiveBinders, a great way to organize & share links, and more!

I've become addicted to a great web 2.0 tool and resource site, LiveBinders. This FREE site is like a digital three-ring notebook binder where, instead of saving and organizing papers, you can save and organize websites by the tabs. I was first introduced to LiveBinders in some webinars I participated in when I noticed the facilitators had organized all of their notes and links to share in these handy LiveBinders. The binders kept all of their resources together in one place with neat tabs labeling each section of the webinar or site link.

As a teacher, and as the technology coordinator for my school, I have found LiveBinders to be an invaluable tool. In the past I have had tons of text windows open to hold and organize my web links to different subjects, objectives, and units as I did my planning. I would copy and paste the web address into the text file and include the name of the site. I might have even gone as far as jotting down a few notes about the site; but I'm a visual person. And, as such, I would often have to go back and revisit the site (copying and pasting the link into the browser) so that I knew which site was which. This was time consuming! I really love how I am able to see the site of the link inside my LiveBinder, and if I wanted to, even browse the site a little from right inside my LiveBinder.

The uses for a LiveBinder are unlimited. Techs can create and organize "how-to" manuals and tip guides for their staff (or district) by topic, even embedding images and videos into the binders. Upload and store documents (PDFs, Word Docs, even PowerPoint presentations) for staff members to easily find under the tabbed system. You can share these binders publicly, or mark them as Private and create a password secured login for you staff. (You control who sees the binders.) Teachers can organize supplemental material online for their units of study, set up activities and additional links for students to visit pertaining to a particular assignment or theme, use them to organize class presentations, set up study guides and test reviews online, keep helpful resources handy in the computer lab, and use them to organize resources for class or group projects.


Live Binder example with tabs and subtabs.


There is a text editor in LiveBinders that allows you to make notes or leave directions about particular sites. This is a great feature for including specific directions about the site being shared. The students will see it before they click on the site link. You can even copy and paste text directly from Word. There are different layouts in the Advanced menu for each tab that allows you to change the layout of where the text is along with the "preview" window for the site.


Text and Media split windows.

Text in title bar above Media window.


Upload and share Word docs, .pdf's, images, video, and more. Sharing bookmarks was never so easy or neat.

Sunday, January 1, 2012

New Year, New Skin

I'm starting out the new year (2012) with a new skin for my blog. I went with a free template I found online (from Templates Block). And after fiddling with it for a bit, I finally got it working and modified to fit my tastes and needs. I liked this skin because it is somewhat of a different layout than the last one, its clean, and it comes close to matching the new skin I have been designing for my website. Its different enough to show that its a blog, but has similar elements to the new design, mainly the wood headers and the golden-orangy text in the header.

I've been having fun today updating and adding more elements to my blog. The map on the right is new to show pins of areas where my visitors are from. I remember there being some discussion in my Twitter PLN this past week about adding maps to Blogger or Word Press blogs. The one on the right is from Whos.Amung.Us. They had a nice assortment of maps to choose from and easily adaptable for my blog. You can easily set the size you need by using the slider on the left side of the map (on their site), then they give you the script to copy and paste into a new widget in Blogger.

Another new feature to the blog is a list of some of my favorite blogs. There are more blogs (and links) that I like to frequent in my STEM Live Binder.

I hope you like it. This redesign has been a long time coming. I'll probably make a few more tweaks to the skin as the design for the site continues, but not enough to mess with the overall look and feel of the template. Let me know what you think. I welcome comments.

Wednesday, December 28, 2011

Twitter - The New Web 2.0 Chatroom

As I was sitting here hanging out in Twitter, one of my favorite spots on the web, it occurred to me that Twitter has become the new chatroom. But, what I also realized was how much better than a chatroom Twitter has become. In the old days of chat (5-10 years ago, after the realization that AOL members rooms and AOL was not for me) I used to frequent a Yahoo chatroom about and for web designers and offer help and advice to those that wandered in. There were other regulars (regs) that would hang out there that we would chat with and get to know, some on a more personal level than others. For me, it was a chance to develop my personal learning network (pln), learn more about web design and graphic design, show off some of my skills, teach others what I know, and to relax and unwind while still maintaining some intellect. For others, it was a place to spam their wares or business, have things done for them, or to look for companionship. We would have the spammers and the porn bots that would come in and invade our chats, but there were ways of dealing with them - usually either through our chat client or by placing them on ignore (into the iggybin).

I liked the fact that it was topic based and that unless you were into web design or graphic design, unless you were a bot or a spammer, the topic stayed around the interest of web design. Occasionally, when I had questions I could not answer about my Macs, I would venture into the MacIntosh room, and always found the regs in the room very helpful. But looking back, it was room hopping and just didn't feel very much like "home".

With Twitter, I can choose who to follow under a multitude of interests and topics, I can follow different (hashtag) conversations, share tweets I find of interest with others that follow my feeds (through retweets), join regularly scheduled weekly chats of my interests, and have the luxury of not having spammers or bot posts show up in my time line feeds. Instead, the spam feeds are kept private to mentions and I can click a button to delete their post, block the sender, and report them as a spammer all in one click of the mouse. My followers never need know of their post unless I choose to share it with them. And with 140 characters to a post, it forces people to think more intelligibly before they post, and we don't end up with those just wandering in saying, "Hai frnd". I really like how I am not limited to a single topic in Twitter, and do not feel like I am wandering from room to room if I want to follow another topic of interest other than web design or STEM teachers. I also don't have to worry about others coming into the chatroom with the obnoxiously large red font crying for help or the "perdy" rainbow font wanting to be your "frnd" as they used to in the old days of Yahoo chatrooms.

I am still able to learn from others, and share my knowledge with others, as I was able to in a regular chatroom, still able to offer help and advice, and able to do all the things I loved about being a reg in a chatroom, only now I can follow the feeds long after I have gone to bed or while I'm busy in school during the day. If anything, I've found that I have learned more in the short time that I have been active on Twitter than the years I have spent hanging out in chatrooms. My PLN has grown by leaps and bounds ever so much more than it has in the chatrooms, and I am finally accepted as an intelligent, funny, interesting, talented woman rather than some geeky chic, Kinetic's girlfriend, or the room's FM (freak magnet).

Tuesday, November 22, 2011

Be courteous, save as legacy

In a recent email to my staff, answering several complaints about different versions of documents, I recommended that they get in the habit of saving their documents in the legacy format, that is the older versions. This way, no matter what computer they tried to access that file on, they would be sure to have a version that would open their files, such as being able to open MS Word docs versus .docx with the extra .xml additions on the file.

How many of us go out and get the latest versions of a program, get all excited about using it and trying it out, only to create something that someone else cannot view because they do not have the current version of that program? I know I have been guilty of this in the past with various versions of Adobe Photoshop and Illustrator. But, what good does it do us to have the latest (and greatest) versions, if we cannot share the files we created in them with anyone?

Thankfully, Microsoft has supplied us with the XML file format converter so that we are able to open .docx, .pptx and .xlsx file formats of Word, PowerPoint, and Excel. But what about some of the other programs that we have gotten used to using, such as iWork Pages and Keynote? How can I change the file format version that is saved on there? If you are fortunate enough to have a copy of iWork '09 on your Mac, you can save copies of what you created as '08 versions, but not '06 or '04. You could also save it as a .pdf if you only want a readable copy to share with others. But, if you want them to be able to edit their copy that you sent them, it looks like you can only go one version back.
From the Save As menu, go down to the bottom of the window, and check the box that says to "Save Copy as:", from here you can save a copy as a MS Word .doc or as one version earlier, as in the example:


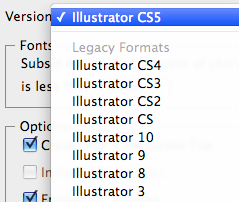
In Adobe design programs, such as InDesign, and Illustrator, it gets a bit trickier to find as you have to do a "Save as" first, name the file, and then when the next window pops up (Options window), you can select your version choice from the legacy format options. I've actually had to do this for a few print shops, as I was excited about having the latest version of Illustrator, designed a logo for school I wanted, and discovered the hard way that not everyone has the latest version. At which point, I felt, like Ooops, sorry!

I have often seen in a network situation like school where computers bought at different times will have different versions of programs or applications installed on them, or will be licensed for different versions of the programs. Then it becomes rather harried when a student starts a project on one computer, and goes to finish it on another computer, only to discover he or she cannot open that file on that computer. Or while working as a member of a team, goes to pass off the file to another team member, who cannot open the file on their computer. However, if we get in the habit of saving files as older versions so that we can pass those on to others, then we can avoid awkward moments, and time spent having to go back and resave and resend those files. This also comes in very handy in a school network situation where you are sharing the files with many people or many computers.


Sunday, November 13, 2011

Twitter for Teachers

My resident tech/web guru suggested Twitter to me as a way of boosting and advertising my website. So, I signed up for an account and thought I would check it out and see what it could do for me. I've had a Twitter account for a little over 2 years and it wasn't until this summer that I have really started using Twitter and making it work for me. Now, I'm not at all sure what its done to drive traffic to my website. And frankly, the site itself is in such a desperate need for a make over and update that I would be embarrassed by the shear numbers that were to visit my site from Twitter. But, what Twitter has done for me is something I never considered at the time I signed up for it - Professional Development!

For those new to Twitter, Twitter is more than checking in when you visit your favorite taco stand. Some of the brightest, funniest, most intelligent and most interesting people I know use Twitter to connect, network, collaborate, and as a means of professional development. Twitter is microblogging, that is, sending out "tweets" in 140 characters at a time. Now, some of you may think this isn't a lot to say what you need to say; but, if you think about it, 140 characters is enough to say what you need to say, and cut out all the extra BS. (I know, I'm in trouble, right?!) Most people have to keep their posted thoughts in under 160 characters anyway for text messages, Twitter is just a way of making sure you get to the point, and quickly.

Since I began regularly using Twitter this past summer, I have been able to network with other teachers from around the world, learn about webinars that were available to me (for free!), join learning networks, and learn from other teacher's blogs without having to Google for the information that I was looking for. I've learned about free tech conferences that were available in my area that I would not have otherwise heard about, and have been able to help colleagues with information I have found in my feed. With Twitter, I feel like I am always in school learning, but I get to control when and where I go to class. There are hashtags that allow you to follow search for and follow particular trends (like #STEMed that allows me to read up on posted tweets about STEM education without having to follow most of the users) or chats. And at 140 characters, its so much easier than doing a book study!

Have an extra few minutes while you are standing in line at Walmart? Take Twitter with you. I guarantee you will get more out of it than reading the headlines on the tabloids. Most of the handheld electronic devices, and smart phones have Twitter apps, such as Twitbird, Tweet Deck, and Peep, to name a few. Most of them are free downloads. And, if you follow a celeb or two, you may even learn some things that they don't post in the tabloids.

Give Twitter a try, but don't be a lurker hiding in the background. Its more fun when you participate in the conversations and feeds. Its easy to get started, just type in a keyword of something you would like to read about, and see some of the posts. If you find a post you like, you can read more about the person in their profile and blog. Use the "Follow" button to follow them. Twitter will suggest other people with similar profiles you may want to follow. But, you can check them out by looking at the tweets (posts) before following them. If nothing else, your students will think you are cool for being on Twitter, and may pay more attention to you.

Tuesday, October 25, 2011

Converting AppleWork files to iWork Pages

So, you have a whole unit worth of lesson plans done in AppleWorks, but Apple has dropped its support of AppleWorks. And even more important, so has your school district! Now what?! Don't fret, and no need to spend your precious spare time (what's that?!) rewriting them; convert them easily into iWork Pages.

Good news! Apple iWork software can be used to convert your AppleWorks wordprocessing and/or spreadsheet files. You can covert AppleWorks wordprocessing files into Pages, and spreadsheet files into Numbers.

Convert AppleWorks files using iWork Pages or Numbers

1. If the file you wish to convert is a ‘wordprocessing’ file, open the application Pages. If the file is a ‘spreadsheet’ file, open the application Numbers.
2. Next access the menu option File-->Open and navigate to the file you wish to convert.
3. Select the file, and click Open.
4. Next access the menu option File-->Save As.
a. Rename the file (i.e., filenameNEW or any tag you wish to identify converted files.
b. Remove any special characters (i.e., quotes, brackets, parenthesis, etc.) and all punctuation except for the suffix ending (i.e., Pages = filename.pages, Numbers = filename.numbers; or in the case of a MS Office file: Word = filename.doc, Excel = filename.xls).
c. Choose a location for saving the file.
d. Click the Save button.
5. Close the file, select the next file to be converted if any, and proceed.
6. When conversion is complete, it is recommended to delete the old AppleWorks file (these files display without the ʻNEWʼ appendage, and may show the suffix ending .cwk) to avoid confusion, and saving unnecessary copies that only take up space.
Please note that AppleWorks ‘drawing’and/or ‘database’files cannot be converted at all –sorry!

One Additonal Note about AppleWorks drawing, or painting files:
You can save and convert these files over the iWork Pages IF you follow these steps FIRST:
◆ Open the drawing or painting file you want to convert in AppleWorks
◆ Edit>Select ALL
◆ Edit>Copy
◆ File>New (Word Processing)
◆ Edit>Paste
◆ You may have to go up to Format>Document and adjust the borders/margins of the document for all of it to show up. Drawing files are by default set up with a narrower page border.
◆ File>Save (or Save As - this should pop up with this being a New file.)
◆ Name your document and click on the Save button
◆ Follow the steps above for opening and converting your AW file in iWork Pages.

Conversion Tip: Export into MS Office Word or Excel
If you would prefer, after converting AppleWorks files into Pages (.pages) and/or Numbers (.numbers), you can ‘export’the file into Word or Excel. Here’s how:

1. With the file open in Pages (or Numbers if you’e working with spreadsheets), access the menu option File --> Export
2. Select the Word (or Excel) icon and click Next
3. Save with a new filename, if desired.

Wednesday, August 3, 2011

Advertisers Beware!

While browsing through one of my favorite lesson plans exchange sites today, a quick tour of the recent additions page, I noticed over half of the posts were from a particular educational software site. I clicked on one of their lesson plans and quickly discovered the instructions consisted of two lines.
  1. 1. Subscribe to their site
  2. 2. Check out this great resource, with a link to that lesson on their site
But not much more to tell you anything about it or how to integrate it into the classroom.

Please excuse this rant, but, when I log into a teacher exchange website, I'm expecting to see posts from other teachers, as opposed to spam. If I wanted spam, I could log into Facebook more often, or revisit an old chatroom I used to hang out in.

If you are an advertiser/software vendor, please post only a few posts in teacher exchange sites telling us a little about your site and ways it may be helpful to us as an educator, rather than dominating the site with useless posts of links to your site. These are not helpful to us, and I find these to be quite a turn off! I've learned much more by a month of two in Twitter communicating with other educator and learning from them about sites that I can really use, and ways they are useful. These are the sites that I repost in emails to my staff, and write about in this blog. Rest assured, if you are an advertiser that posts nothing more than links to subscribe to your site and a resource page on your site, I will avoid your site. An advertisement is supposed to entice the viewer to your product, not turn them off from it. So spend a few extra minutes telling us about your site and what it can do for us rather than simply posting links to pages in your site.

Just my thoughts. Who am I? I am the consumer you are targeting, and I am the consumer that can make or break your business through all of my contacts, and their contacts.


Create page flipping books with FlipSnack

I really wished I would have known about this site two years ago, or wished this site had been around a couple of years ago. A quick look at their registry tells me it wasn't around... This site would have saved me so much time, and my family so much aggravation in watching me spend more than two hair pulling weeks trying to create what this site can create for you in minutes. I'm talking about FlipSnack, part of the SnackTools site free site tools line, that takes your .pdf files and turns them into beautiful page turning digital books that you can share.

Creating an interactive page turning digital book with FlipSnack takes only a few minutes, and is pretty simple to do. When you log into the site (free registration), click the big yellow "Make a flipping book" button, or the Create a book link at the top to start creating your page flipping book. You are given options to either browse your computer for a .pdf file, or enter the URL to a .pdf file that you would like to turn into a book. Then allow it a minute or two to upload your .pdf file. From there it will take another few moments for it to compile your book. (Go check your email or Twitter feed for a minute or two while this is going on.) When its done, the fun begins. Click the Next button and you can easily customize your book. The interface gives you choices to customize the background color or texture behind your book, template styles, and size options for your book. You can view it in widget mode or full-screen view. There are also options for including sharing options for you book, so the viewer can share it in a number of social networking sites such as Twitter, Facebook, and Blogger. When you've achieved the look you like, click the Finished button and its done. You are given a link to your book, with other options for sharing, such as embedding.

There is a premium (VIP) version of the site for $24 a month that gives you access to all of the Snack Tools sites with premium embedding (no watermark), and downloading options, but for most uses, the free version will suite you just fine.

I created this page flipping book in about five minutes from a file I already had uploaded on my site of a photography weekend trip I took last summer.


However, my Creativity Portfolio book I created for my Creativity in the Classroom class I took a couple of years ago took me several weeks of searching through free and relatively inexpensive flash and javascript catalog and photo album page turning book scripts, and trying to figure out the code and integration myself. It was a maddening two weeks + around my house during that time. Yes, I learned a lot from that experience, and can say I know the technology behind this, but its not something I do everyday, nor have I repeated the experience since then. FlipSnack makes this process a whole lot simpler and quieter! I don't think any one else in the house knew I was creating the book this time around, at least not until they read this!

Imagine adding an extra dimension to those teaching portfolios with an interactive digital page flipping book, create exciting interactive story books for your students, or have your students work a math story then turn it into a beautiful book they can share.